Webpage Live Streaming

Live streaming of webpages can be carried out on social media destinations, streaming platforms, websites, blogs or any RTMP servers by the Livebox Autostream feature. When it comes to the webpage live streaming, it is useful to live stream the subscribers/viewers count or the countdown timings before starting a live streaming event.

To live stream a webpage,

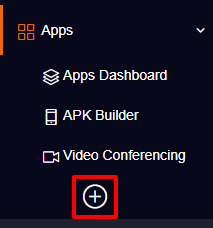
  • Go to Livebox Autostream.
  • Click on the “Create” button.
create playlist
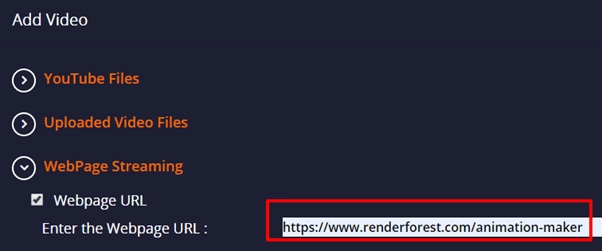
  • Then on the Playlist creating options, select Webpage streaming.
webpage streaming option in Livebox Autostream
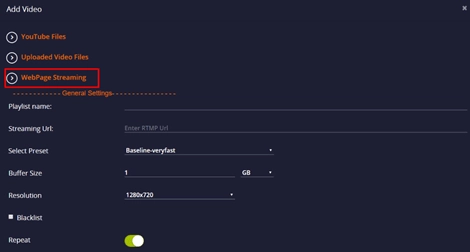
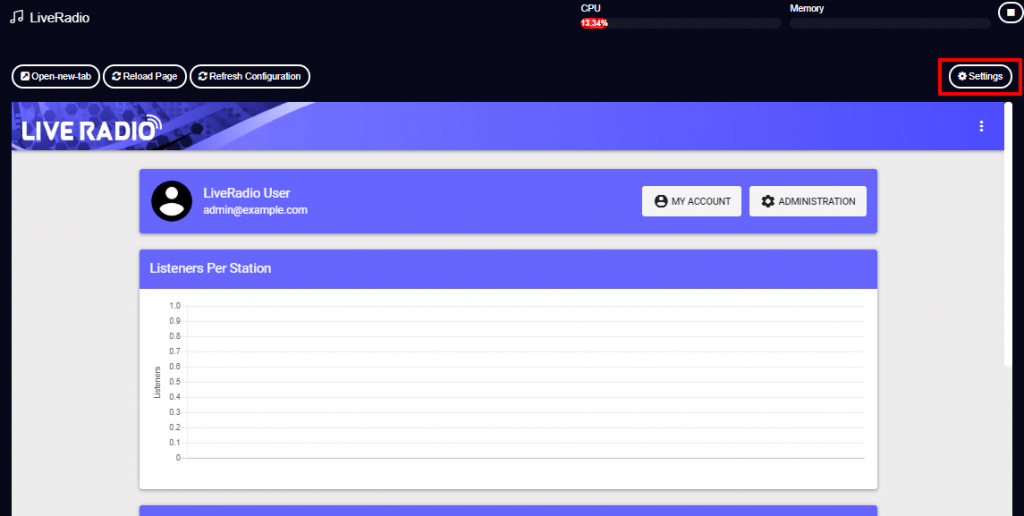
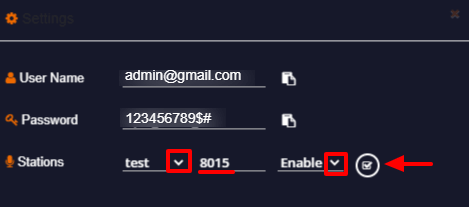
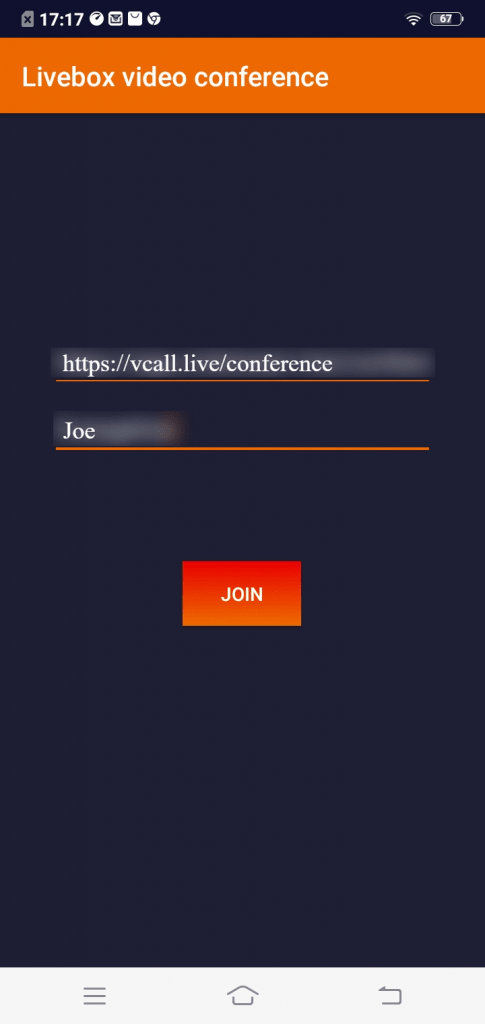
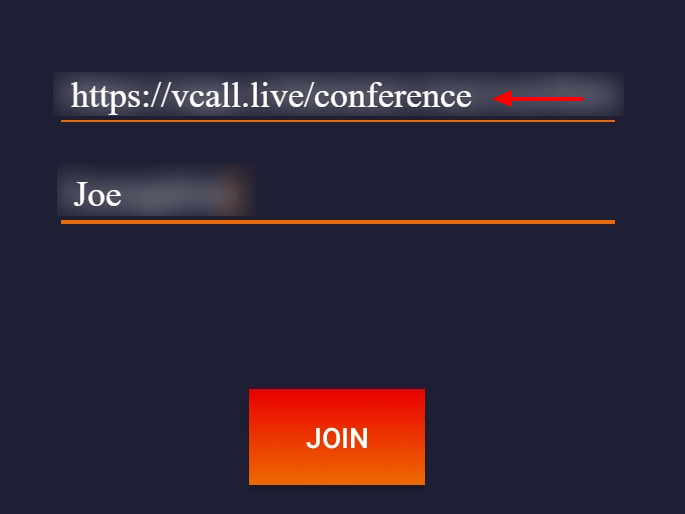
  • In the Webpage URL option, enter the URL of the webpage that you want to capture and live stream on your preferred destinations.
webpage streaming
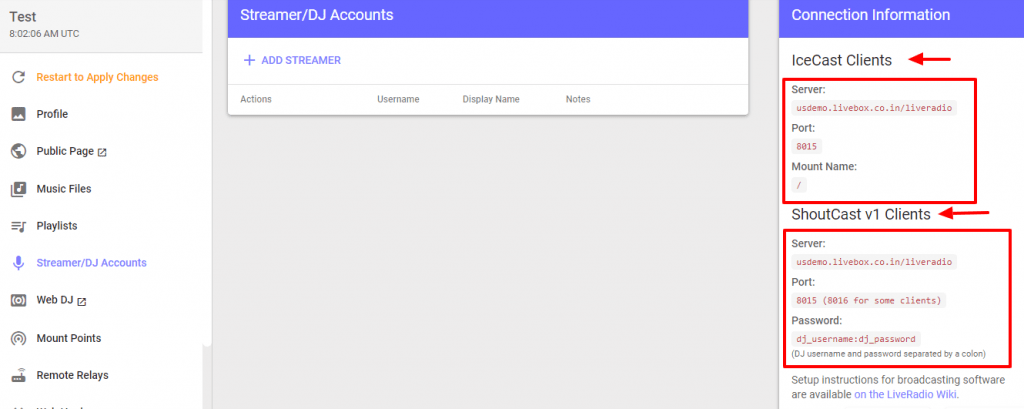
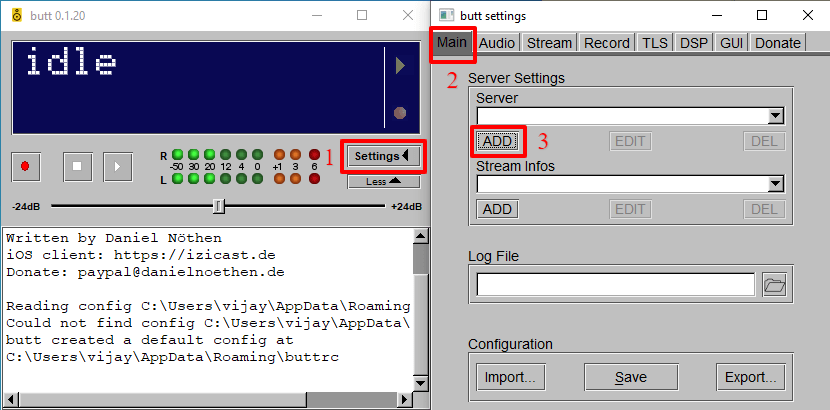
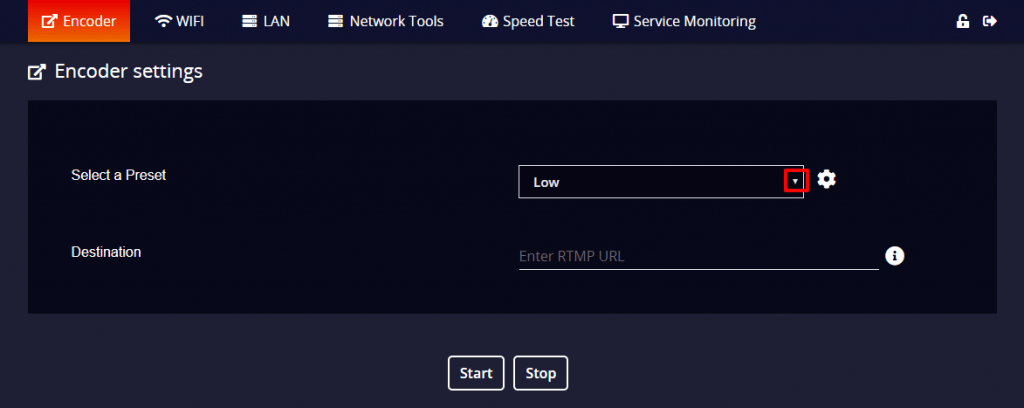
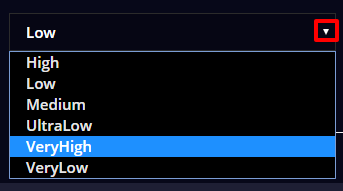
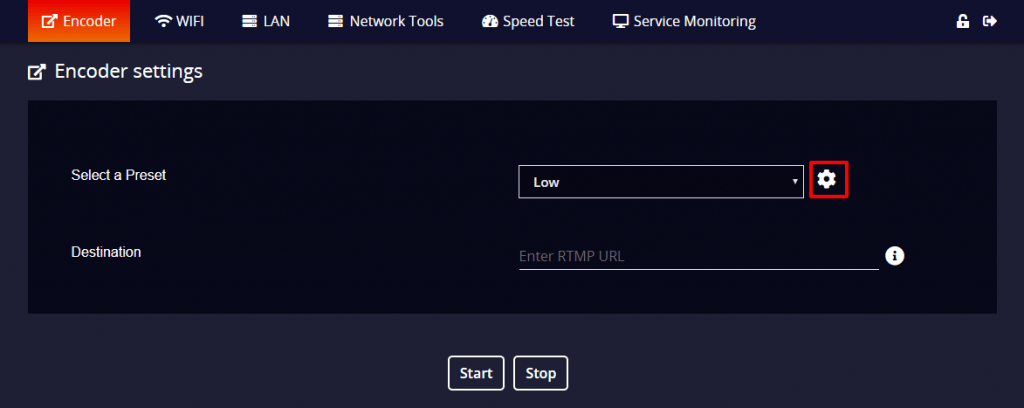
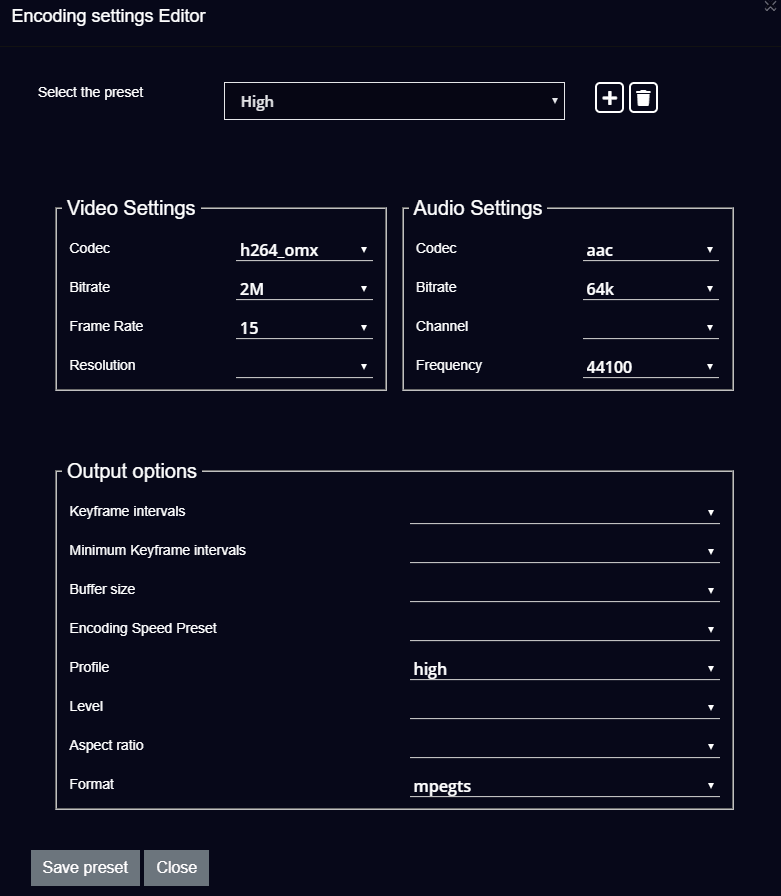
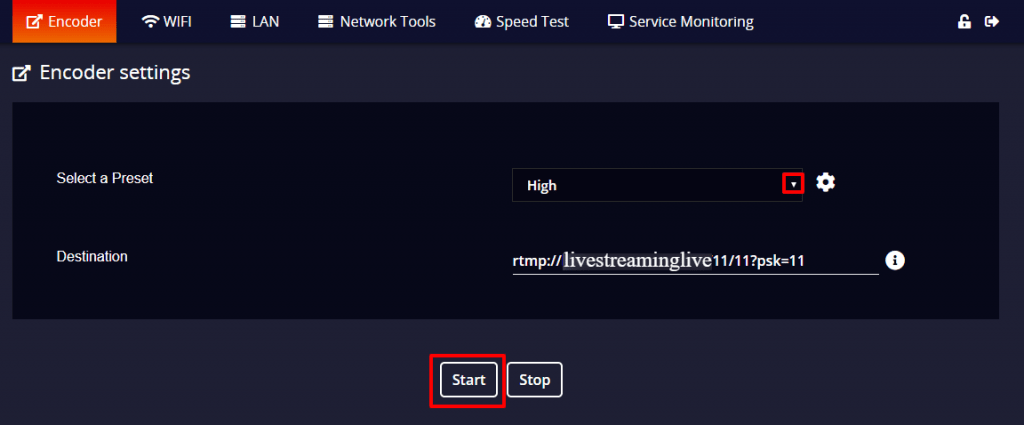
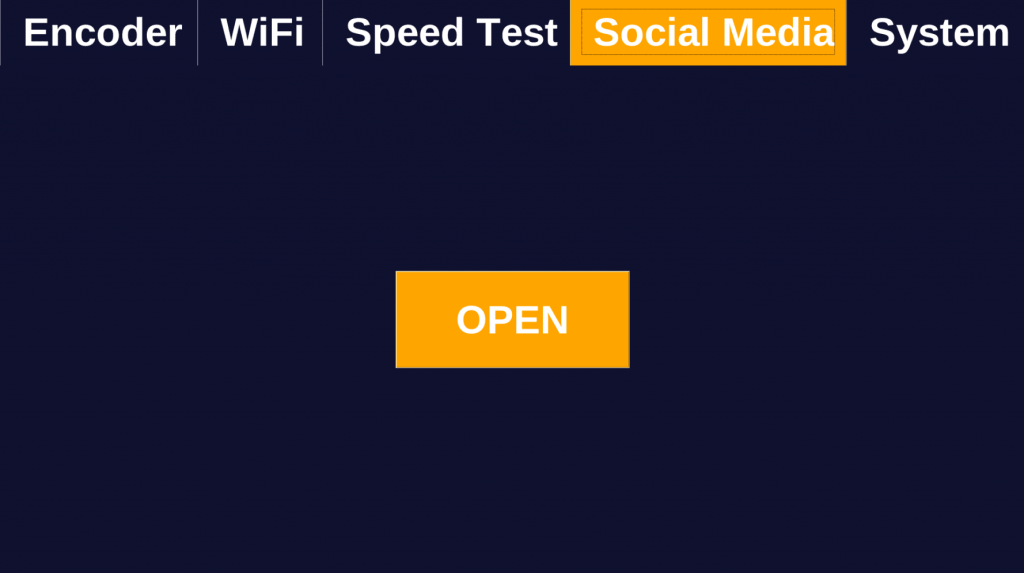
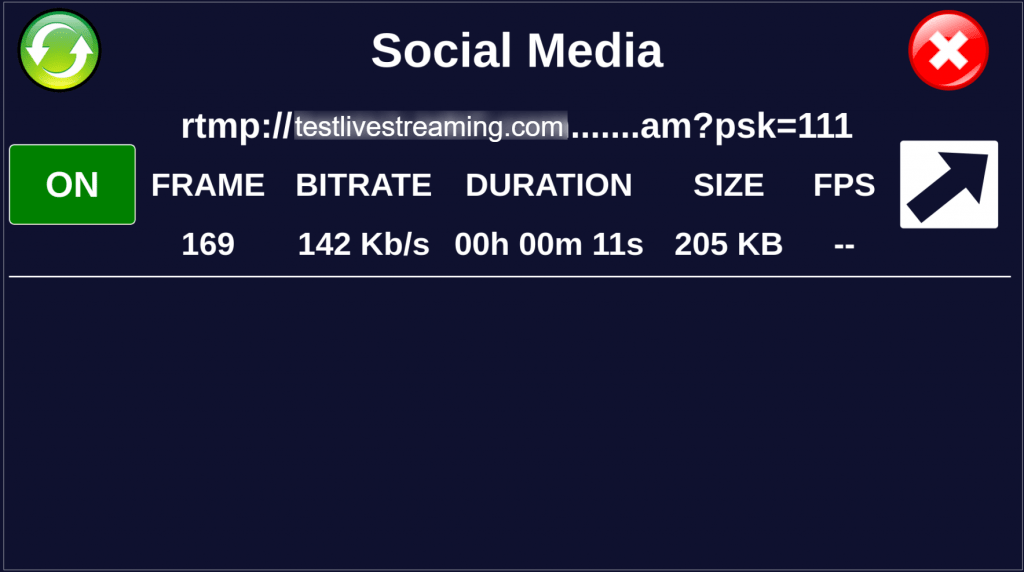
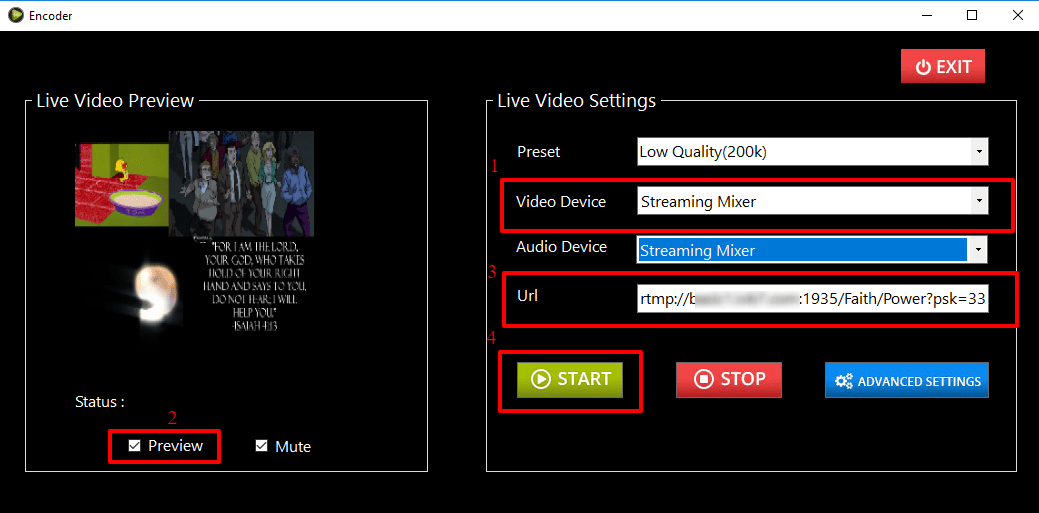
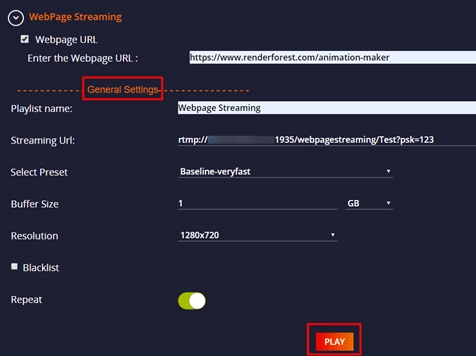
  • Then under the “General Settings”, enter Playlist name, then Streaming URL of your destination, select a preset, set buffer size and resolution, then finally click the “Play” button.
webpage url streaming
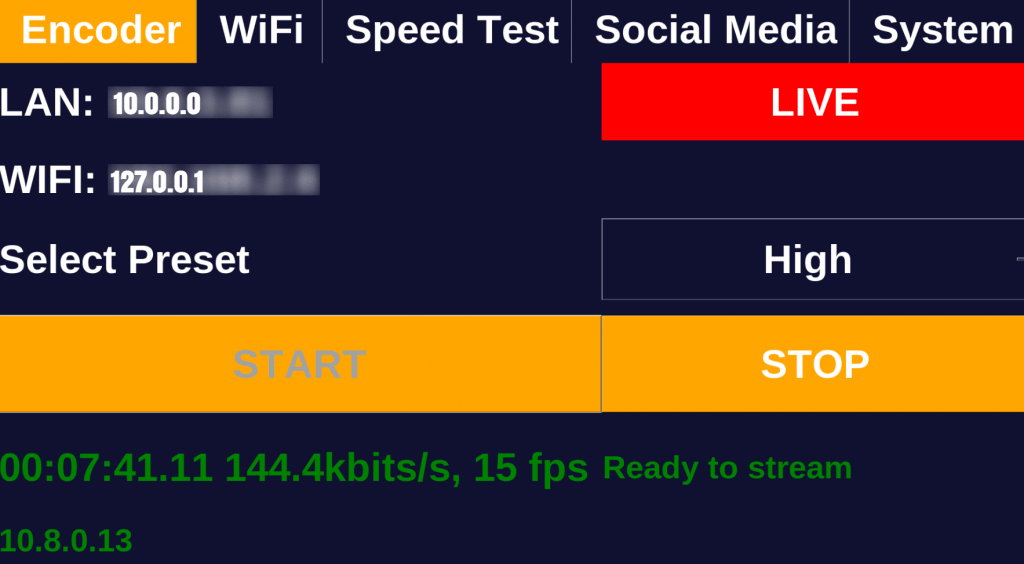
  • The live streaming of your webpage will begin on your streaming destination within a few seconds.
live webpage streaming

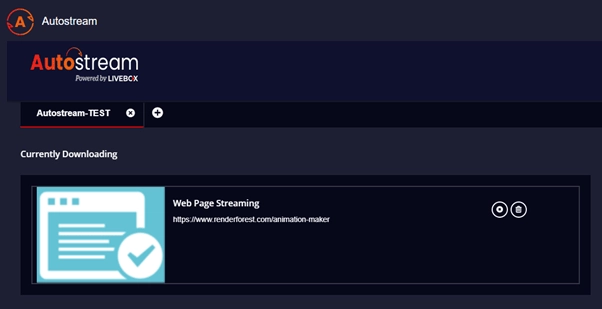
You have successfully kick-started the webpage live streaming on your streaming platforms.

How to Get Started with the Livebox TV Mobile App?

  The Livebox TV is available to the user in both websites and in the mobile app. In today’s scenario, most of the world’s population uses mobile phones, so the presence of a mobile app of your channel can make you connected with your viewers 24/7. Thus by not constraining yourself only to the website, you can also switch between a mobile app for your Livebox TV. The Livebox TV mobile app is user-friendly and the following steps will help you to understand the Livebox TV better.

  • Install the Livebox mobile app.
Livebox IPTV mobile app
  • Now you are looking at the first step of your mobile app. Wait for few seconds and you will be connected to the login portal.
mobile app Livebox
  • Through this login portal, the user can register to subscribe your TV channels.

Note:  If your user registers from their mobile to subscribe to your channel, it is enough of you to activate your user’s device in your Livebox TV Manage Device option.

Livebox IPTV
  • In the Livebox TV app, the user can get their mobile “device ID” by clicking the option provided at the top corner.
  • The registered user can log in to your Livebox TV by entering their Email and password stay in touch with your service 24/7.

Note:  The device ID is very important for the activation of your Livebox TV service to the user device.

IPTV Livebox
  • This is how your mobile app interface looks like once the user gets logged in.
  • The user can access your different channels from the navigation menu.
Livebox IPTV set up
  • In this given image, you can see a channel “Cricket” under the “Sports” category.
  • By clicking on the thumbnail image of your channel, the user can get to see your programs.
private IPTV set up from Livebox
IPTV setup from Livebox

This is how your Livebox TV user views your distribution of programs. It doesn’t stop just with this, you can also,
– Produce broadcasting programs.
– Buy some broadcast syndication programming.
– Be part of the high-scale broadcasting network.
With Livebox TV You can set up your professional TV station that too in a low-budget expense.

How to Broadcast on Live Radio App using the BUTT Streaming Software?

  • Install BUTT streaming software on your PC.

(BUTT is a multi-operating system client broadcaster. The software is compatible with Linux, Mac OS X, and Windows.)

  • Now back on the Live Radio app, create your Station.
  • Create a Streamer DJ account on the Live Radio app.
  • Make sure that you have enabled your SHOUTcast/Icecast Port on the “Settings”.
shoutcast-settings
  • Select the “Station” to which you are broadcasting and set the SHOUTcast/Icecast port.
  • Then enable your port and “Save” the settings.

Note:  To get your Port details, go to your Streamer DJ account.

port-settings
  • Then go to Streamer/DJ Accounts from the navigation menu. 
live-radio
  • And here you’ll be getting your Icecast/SHOUTcast V1 client details.   
streamer DJ account
  • Now go to the BUTT streaming software.
  • Click the “Settings” button.
  • A dialog box opens, where under the “Main” menu, you’ll get the “Server Settings”.
  • To add your Server, click the “ADD” button.
settings
  • A dialog box “Add Server” opens, where you can fill your server details.
  • To get your server details, go to Streamer/DJ Accounts from the Live Radio’s navigation menu.
BUTT broadcasting server
  • On the Streamer/DJ Accounts, you can get your server details under “Connection Information”.
  • So back on your BUTT settings, enter your name, select your type, and then give your server address and port.

(The below illustration is applicable only when you are using SHOUTcast client details)

BUTT broadcasting server settings

(The below illustration is applicable only when you are using Icecast client details)

BUTT broadcasting server stream setting
  • Now to get your password i.e, if you are the admin of this app, then you can go back to your station profile.
  • On your profile under Broadcasting Service, you can get your source password.
  • Back again on the BUTT settings, enter the password.
  • After entering your details, click the “ADD” button.
live streaming using BUTT broadcasting server
  • Your server settings will be added.
  • Finally, you click the “Save” button.

Once the information has been saved, a Connection established message will appear along with a configuration summary. You can now go on with your radio broadcasting by clicking on “Play”. 

radio broadcast using BUTT broadcasting server-
radio broadcast BUTT broadcasting server

Once you are connected, a timer will be displayed. That’s it, you’re now broadcasting!

How to Live Stream using the Livebox Instacast Encoder Device?

The Livebox Instacast is a portable hardware encoder device that can live stream even with the low-internet connectivity. It is just enough to have this encoder device fixed to the camera to start the live streaming from anywhere. Even in the absence of a camera, live streaming can still be carried out with the help of a USB device.

So, to live streaming using this Livebox Instacast encoder device,

Note:  To access the Encoder settings page from your browser, you can use the IP visible on your Encoderdevice along with the port URL (:3978) provided by the IVB7 team. E.g., 127.0.0.1:3978

  • Turn on your Livebox Instacast device.
  • Make sure that you have connected your camera/USB device to the Livebox Instacast encoder.
  • For the network connectivity, you can use it through the LAN or Wi-Fi connection.
  • Now login to the Encoder settings page from your browser.
instacast encoder portable hardware device
Instacast device from Livebox
  • In the Encoder settings, select a Preset by clicking the drop-down menu.
preset-encoder
preset-options
  • You can also create your own preset by using the given readymade preset values.
preset-settings
SD-encoder-preset-setting
  • After selecting the preset, you can enter the RTMP URL of your Livebox server channel, social media accounts or any RTMP servers and click the “Start” button.
SD-encoder-preset-setting
  • It shows the Live streaming status on the bottom of the “Encoder settings page” as well as on the “Encoder device”.
live-on-SD-Encoder

Now to control your live streaming from your device touchscreen,

  • Go to Social Media menu from your device touchscreen.
portable hardware encoder device
  • And here you can control the live streaming activity on your destination.
socialmedia-destination

Well, the live streaming through this Livebox Instacast Encoder device is successful on your server channel. Now, from your server channel, you can launch your live streams on your preferred destinations.

How to Create a Video Conference App on Livebox?

To create a video conference mobile app,

  • Go to the Livebox App Store.
video conferencing app
  • Install the APK Builder app.
APK Builder app
  • Click the “Create an App” button under the Livebox Video Conference specification.
APK-Developer
  • Give a name for your app, then enter the display name and app description.
video conferencing app generator
  • Then browse and set your app icon and logo.
  • Then finally click on the “Generate App”.
app-creation
  • Your app creation process begins and when it says at the end like “Click the below” button to download APKclick on the “Download APK” button.
easily-create-your-mobile-app
  • The app gets downloaded to your PC downloads in the zip file format. So, extract the file.
video calling app
  • In the unzipped file, you can use the “Testing.apk” to test the app on your device and “Release.apk” to upload your app to the play store.
Apk Builder

Now, finish the app installing process on your mobile device.

  • Then get into your brand-new app from your mobile device.
  • Set your chat name and click the “Join” button.
video conferencing app from Livebox
  • To invite your peers to the video call, you can just send the link, so that, they can join you from anywhere.
videoconferencing app builder

And within a few seconds, you can join on a video call with your peers irrespective of the place and distance.

How to Set Up the Livebox Internet Bonding Device?

Double, triple, quadruple your Internet speed by using the Livebox Internet Bonding device. If you are facing network failover or if you want to maintain the bandwidth robustness while on live, you can gallop your current Internet connections to new speeds by using this bonding device.

To initially set up your Livebox Bonding device,

  • Turn On the Livebox Internet Bonding device.
  • And access the device interface on your PC using the IP 192.168.95.1.
  • On the device interface, pick up the Device ID and Hardware Key and send it to the IVB7 support team through Email.
internet bonding device
  • The IVB7 support team, in turn, will send you the License Key.
  • So, after entering the License Key, you can click Save.
Internet bonding device from Livebox
  • Now you will be taken to the Livebox Bonding device login interface and you can login. (The IVB7 team will provide you the login credentials)
Livebox Internet bonding device
  • Back on your system interface, you have to reboot the server first.
bonding device
  • Then go to “Settings” to configure your Bonding device.
  • To configure the device, enter the Server IP and Server Key provided by the IVB7 team and click “Submit” button.
Internet bonding device for fastest internet
  • Now “Insert SIM cards” with data in the slots given on the device.
  • Then you have to reboot each SIM card.
Bonding SIM reboot
  • Then you can set your SIM cards status.

Note: 

  1. Master- When you set a SIM as Master, it plays the role of the main SIM card.
  2. Backup- When the Master SIM card fails, the Backup SIM becomes
    the Main card.
  3. ON- All the turned ON SIM card data combines to the Master
    SIM card.
  4. OFF- You can Turn OFF the SIM you are no longer using.
  • You can also select the Network for each SIM card. 
Bonding Network

Once you set up the above settings, the bonded Internet of your SIM card data will take into new speeds. 

And you can use your blazingly-fast bonded Internet either through LAN or Hotspot option.

How to Broadcast on Live Radio App using the BUTT Streaming Software?

  • Install BUTT streaming software on your PC.

(BUTT is a multi-operating system client broadcaster. The software is compatible with Linux, Mac OS X, and Windows.)

  • Now back on the Live Radio app, create your Station.
  • Create a Streamer DJ account on the Live Radio app.
  • Make sure that you have enabled your SHOUTcast/Icecast Port on the “Settings”.
shoutcast-settings
  • Select the “Station” to which you are broadcasting and set the SHOUTcast/Icecast port.
  • Then enable your port and “Save” the settings.

Note:  To get your Port details, go to your Streamer DJ account.

port-settings
  • Then go to Streamer/DJ Accounts from the navigation menu. 
live-radio
  • And here you’ll be getting your Icecast/SHOUTcast V1 client details.   
streamer DJ account
  • Now go to the BUTT streaming software.
  • Click the “Settings” button.
  • A dialog box opens, where under the “Main” menu, you’ll get the “Server Settings”.
  • To add your Server, click the “ADD” button.
settings
  • A dialog box “Add Server” opens, where you can fill your server details.
  • To get your server details, go to Streamer/DJ Accounts from the Live Radio’s navigation menu.
BUTT broadcasting server
  • On the Streamer/DJ Accounts, you can get your server details under “Connection Information”.
  • So back on your BUTT settings, enter your name, select your type, and then give your server address and port.

(The below illustration is applicable only when you are using SHOUTcast client details)

BUTT broadcasting server settings

(The below illustration is applicable only when you are using Icecast client details)

BUTT broadcasting server stream setting
  • Now to get your password i.e, if you are the admin of this app, then you can go back to your station profile.
  • On your profile under Broadcasting Service, you can get your source password.
  • Back again on the BUTT settings, enter the password.
  • After entering your details, click the “ADD” button.
live streaming using BUTT broadcasting server
  • Your server settings will be added.
  • Finally, you click the “Save” button.

Once the information has been saved, a Connection established message will appear along with a configuration summary. You can now go on with your radio broadcasting by clicking on “Play”. 

radio broadcast using BUTT broadcasting server-
radio broadcast BUTT broadcasting server

Once you are connected, a timer will be displayed. That’s it, you’re now broadcasting!

How to Create an IPTV Mobile App for the Livebox TV Station Set-up?

With the APK Builder provided by Livebox, you can create mobile apps for your IPTV set-up and even for the viewers to view all the live streams you can create a single page app to stay updated with your live streams right from their mobile devices.

To create a mobile app for your IPTV set up,

  • Install and open the APK builder app.
  • If you want to create an app for your IPTV broadcasts, then click “Create an App” under Livebox TV.
mobile-app-for-IPTV
  • In the App Creation Form, give app name, display name, app description.

Note:  In App Name, there shouldn’t be any space or special characters given.

  • In the Server URL, the app creation form will automatically read your server URL and display it on the bar.
  • Then browse and set your app icon and logo.
  • Then finally click on the “Generate App”.
mobile-app-creator-in-Livebox
  • Your app creation process begins and when it says at the end like “Click the below button to download APK”, click on the “Download APK”.
easily-create-your-mobile-app
  • The app gets downloaded to your PC downloads in the zip file format.
  • Unzip the file, where you can use the Testing.apk to test the app on your device and Release.apk to upload your app on the play store.
Apk Builder

Creating a mobile app with Livebox is easy and only a few step process where you can develop a mobile by yourself.

How to Download the Livebox Playout and Video Mixer Software?

   Livebox is the only live streaming server that comes with in-built Playout Software and Video Mixer which can be downloaded cost-free. To download Playout Software, Encoder and Video Mixer,

  • Go to Account Settings and click Download.
Livebox software download
  • Download option for both Android and Studio shows up.
app download
  • If you are an Android user you can download by clicking Android App, otherwise, click Studio to download PlayoutEncoder, and Video Mixer software.
  • A new page in Livebox with options to download playout and video mixer opens. You can click Download Playout and Video Mixer to get started with the other facet of Livebox.
  • Then click Generate Pin to get your unique pin code to license your authorization to playout and mixer software.

Note:  The generated pin is restricted to be used by one PC. But you can always generate one to a few pins to download and use the software from different PCs.

playout and mixer
  • Once you click Generate Pin, the options to generate your pin appears, where you can give your pin name and then click the generate icon to get your pin.
generate pin
pin generate
  • Your pin is generated.
  • You can even edit your generated pin as you wish by clicking the edit icon.
edited pin
  • After editing your pin, click the tick icon to save your changes.
save pin
  • The red dot on the pin name suggests that the pin is not in action.
software pin generate
  • The green dot on the pin name suggests that the pin is active, and also it shows the name of the hardware that uses the pin.
Livebox mixer and playout software
  • Now go to your system downloads and complete the installation process of your playout, Encoder and mixer software. The installed file will appear on your desktop as,
mixer and playout software
  • Click the Mixer and Playout file in your desktop, a new dialog box Encoder-Mixer-Playout opens.
mixer and playout software installation
  • In Encoder-Mixer-Playout, you can enter your server name and give the pin generated by Livebox, and then give “Submit”.
mixer and playout software getting started
  • You have successfully installed the Encoder-Mixer-Playout software.
mixer and playout from Livebox

You have successfully installed the Encoder-Mixer-Playout software.

How to Mix Streams Using the Livebox Mixer?

 The Livebox mixer is one of the dimensions of the Livebox streaming server. With the Livebox mixer, you can mix and match your streaming contents based upon your needs. And also, you can add effects and configurations to your streams by using the Livebox mixer.

  • Login to your Encoder-Mixer-Playout software and open the Livebox Mixer window.
mixer software
  • Click inside the “Add Source” area to add your video source. Likewise, you can add two or more sources to proceed with your mixing.
mixer software from Livebox
  • A new dialog box “Menu_Dialog_Form” opens, where click the option “Add File” to add your local files.

Note: -To add your professional camera or webcam sources, click the Add Live option.-To add URL from any other media platforms, click the Add URL option.-To add your Livebox playout sources, click the Add Playlist option.

software from Livebox for mixing videos
  • Now your sources are added, click the drop-down menu from the “Transition” option and select the required transition effect and also set time for your transition effect.   
mixer software from Livebox

Note:  Scroll down for more options like adding the scrolling text, PIP option and also alternative audio file for your source. You can also remove your source by clicking the remove option.

Livebox mixer software
  • You can see different transition effects for the added source in the below illustration. There are so many interesting transition effects available for your contents.
Livebox mixer software for mixing videos
  • You can view your source in the preview area. If you want to set or change your background in the preview area, click “BG” to have the background for your streaming project.
mixer software for live streams mixing
  • After doing all these settings, you can click “Save” to save it to your local files. In the same way, you can click the option “Load” to take your saved contents from your local files (This is optional if you are doing it for your future broadcast purpose).
  • The marked arrow portion is to manually set your transition time.
best mixer software
  • Now go to the Livebox encoder and select your Video Device and Audio Device.
  • You can also go to your usual encoder to encode your source.
streams mixing
  • Then go to Livebox and create your channel.
  • From Livebox Channel Dashboard copy the streaming URL and paste it in the Livebox encoder URL bar.
  • To preview your stream, click the preview option.
  • And then click the “Start” option to stream your contents.
mixing streams
  • After setting all your transition effects and the encoder set-up, come back to your Livebox mixer window to click the content, from where you want the transition to happen.
  • In this given illustration you can see the transition effect between two streaming contents. 
mixing live streams

You are now successful in mixing and streaming your contents